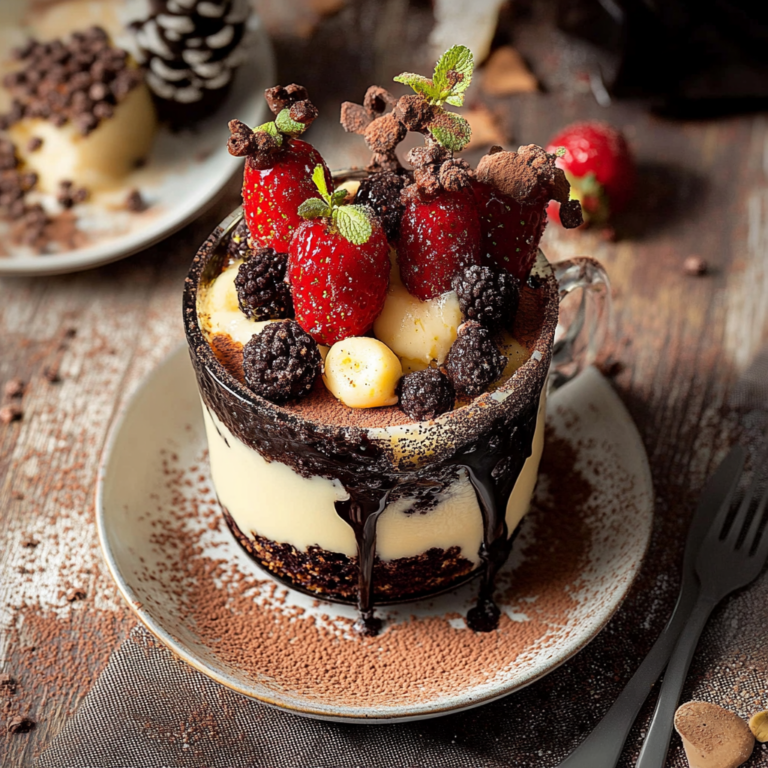
Irresistible Wild Forest Classic Dirt Pudding Cake Recipe
The moment you take a bite of the Wild Forest Classic Dirt Pudding Cake, you’re enveloped in a warm embrace of flavors and textures that dance delightfully on your palate. The creamy layers of rich chocolate pudding mingle with the crunch of crumbly cookie “dirt,” creating a nostalgic treat that feels like a hug from an old friend. This beloved classic has been given a delightful twist—perfect for those seeking a guilt-free indulgence without sacrificing taste. Whether you’re gathering around the table for the holidays or sharing laughter on a cozy evening, this cake evokes heartwarming memories and joyous celebrations.
Imagine the aroma wafting through your kitchen as you prepare this indulgent dessert, enticing everyone with its promise of sweetness. This version is not only simple to make but also versatile enough to adapt to various dietary needs, ensuring that everyone can join in on the fun. So grab your mixing bowls, gather your loved ones, and let’s create something unforgettable together!
Why You’ll Love This Wild Forest Classic Dirt Pudding Cake
- **Convenient and Quick:** Requires minimal prep time, making it perfect for last-minute gatherings.
- **Decadently Creamy Texture:** Each bite is luxuriously smooth, offering an irresistible melt-in-your-mouth experience.
- **Healthier Twist:** We use wholesome ingredients that allow you to indulge without guilt—perfect for health-conscious friends and family.
- **Versatile Dessert:** Adaptable to various preferences (dairy-free, gluten-free options) while still being crowd-pleasing.
- **Nostalgic Flair:** A classic recipe that brings back fond childhood memories and creates new traditions around the table.
- **A Feast for the Eyes:** Layered beautifully, it’s visually stunning—ideal for impressing guests at any celebration.
Preparation Phase & Tools
To achieve that irresistibly creamy texture in your Wild Forest Classic Dirt Pudding Cake, investing in quality tools is essential. For the creamiest result, a high-speed blender works wonders in blending your ingredients into an ultra-smooth pudding. Additionally, using a good mixing bowl with a sturdy spatula will help incorporate all elements flawlessly. Having measuring cups and spoons handy ensures precision in crafting this delightful dessert. Lastly, don’t forget to have an 8-inch square baking dish ready; it’s perfect for layering those delectable components!
Preparation Tips
– **Use Room Temperature Ingredients: ** Allow your ingredients like milk or cream cheese to come to room temperature before mixing. This helps them blend seamlessly, resulting in an ultra-smooth texture.
– **Toast Your Cookie Crumbs: ** Lightly toasting your crushed cookies before layering adds depth and enhances their flavor profile, bringing out nutty undertones that elevate the overall taste.
– **Chill Your Pudding Thoroughly: ** After preparing your pudding mixture, allow it ample time to chill in the refrigerator. This step is crucial for achieving that perfect set before layering it into your cake.
– **Sift Cocoa Powder: ** If using cocoa powder for added richness, sifting helps prevent clumps and ensures even distribution throughout the pudding.
Ingredients for Wild Forest Classic Dirt Pudding Cake
– 2 cups dairy-free milk (unsweetened)
– 1 cup coconut cream (chilled)
– 1/2 cup cocoa powder (sifted for smoothness)
– 1/2 cup maple syrup (natural sweetener)
– 1 teaspoon vanilla extract
– 1 cup crushed chocolate sandwich cookies (toasted if desired)
– 1/2 cup chopped nuts (optional; for added crunch)
Step-by-Step Instructions
**Step 1: Prepare Your Pudding Base**
In a high-speed blender, combine dairy-free milk, coconut cream, sifted cocoa powder, maple syrup, and vanilla extract. Blend until silky smooth—you’re looking for a luscious consistency that makes your mouth water just thinking about it! Scrape down the sides if necessary to ensure everything gets mixed evenly.
**Step 2: Chill the Mixture**
Pour your blended pudding into a medium bowl and cover with plastic wrap. Chill in the refrigerator for at least one hour or until set—this waiting period allows flavors to meld beautifully while creating that dreamy texture.
**Step 3: Assemble Your Layers**
Once chilled, it’s time to layer! In your prepared baking dish, start by adding half of your chocolate pudding mixture as the base layer. Spread it evenly with a spatula until it’s nice and smooth—a visual cue here is having no lumps or unevenness.
**Step 4: Sprinkle on Some Crunch**
Next up is adding half of your toasted cookie crumbs over the pudding layer. Gently sprinkle them evenly across so every bite later includes that satisfying crunch against the creamy backdrop.
**Step 5: Repeat Layers**
Now add another layer of pudding on top of those cookie crumbs—use the spatula again to spread this second layer out until smooth! Finish off by sprinkling remaining cookie crumbs (and nuts if you’re using them) on top as a delightful garnish.
Stay tuned for more delicious details as we move forward with this delightful recipe!
Watch Out for These Mistakes
Creating the perfect Wild Forest Classic Dirt Pudding Cake can be a little tricky if you’re not aware of common pitfalls. Here are some mistakes to avoid:
– **Skipping the chilling time: ** Rushing the chilling process can lead to a cake that doesn’t set properly. Without adequate time in the fridge, your layers may become a soupy mess instead of holding their delightful shape.
– **Using warm ingredients: ** Mixing warm cream or melted chocolate into your pudding can cause it to curdle or separate. Always ensure your ingredients are at room temperature for a smooth, creamy consistency.
– **Overmixing the whipped cream: ** While you want fluffy peaks, overmixing can lead to grainy, butter-like textures. This will detract from the lightness that makes this cake a delight.
– **Not sifting the cocoa powder: ** Cocoa powder can clump together, leading to uneven distribution throughout the cake. Sifting it ensures a consistent flavor and prevents those pesky lumps.
– **Improper layering: ** If you don’t layer carefully and evenly, you could end up with a lopsided cake that looks uninviting. Take your time to spread each layer evenly for visual appeal as well as flavor balance.
Storage Instructions
To keep your Wild Forest Classic Dirt Pudding Cake fresh and delicious, follow these storage tips:
– **Refrigeration: ** Store any leftovers in an airtight container in the refrigerator. It will stay fresh for up to 3-5 days.
– **Freezing: ** Yes, you can freeze this cake! Just wrap it tightly in plastic wrap followed by aluminum foil before placing it in the freezer. It will maintain its quality for about 1-2 months.
– **Thawing and Reheating: ** When you’re ready to enjoy your frozen cake, transfer it to the fridge overnight to thaw slowly. Avoid reheating; this dessert is best served chilled or at room temperature.
Estimated Nutrition (Per Serving)
While enjoying your slice of Wild Forest Classic Dirt Pudding Cake, here’s what you might expect nutritionally (per serving):
– **Calories: ** 300-400
– **Protein: ** 4-6g
– **Carbs: ** 40-50g
– **Sugars: ** 20-25g
– **Fat: ** 15-20g
These values can vary based on specific ingredient choices and portion sizes.
Frequently Asked Questions
- **Q:** Can I substitute dairy-free alternatives?
- **A:** Absolutely! Substitute regular milk with almond milk or coconut cream for a dairy-free version without sacrificing flavor.
- **Q:** Is there a gluten-free option?
- **A:** Yes! Use gluten-free cookies for the crust layer, ensuring all other ingredients are labeled gluten-free.
- **Q:** Can I make this dessert ahead of time?
- **A:** Definitely! You can prepare it a day in advance and let it chill overnight for enhanced flavors.
- **Q:** What if my pudding is too thick?
- **A:** If your pudding mixture feels too thick, add a splash of milk while stirring until you reach your desired consistency.
- **Q:** How do I fix a grainy texture in my whipped cream?
- **A:** If your whipped cream has turned grainy, gently fold in a little more heavy cream until smooth again without overmixing.
- **Q:** Can I add extra flavors?
- **A:** Of course! Feel free to add extracts like vanilla or almond or even mix in some crushed berries for added depth of flavor.
Conclusion
There’s nothing quite like indulging in a slice of Wild Forest Classic Dirt Pudding Cake—it’s comfort food at its finest! So why wait? Gather your ingredients today and bring this warm, nostalgic treat into your home. Don’t forget to share this recipe with family and friends; it’s sure to become a beloved favorite!