Irresistible Wild Forest Classic Dirt Pudding Cake Recipe
There’s something so nostalgic and comforting about a dessert that brings back childhood memories, isn’t there? Wild Forest Classic Dirt Pudding Cake is one of those delightful treats that instantly transports you to carefree days spent in the sun. This layered dessert is a crowd-pleaser at birthday parties, family gatherings, or just a sweet indulgence after dinner. Its rich chocolatey flavor combined with creamy layers makes it an irresistible choice for any occasion.
What I love most about this recipe is how easy it is to whip up and how much joy it brings to everyone who tries it. Whether you’re making it for a special event or simply to enjoy at home, this cake is sure to become a favorite in your household too!
Why You’ll Love This Recipe
– Easy to make: This recipe requires no baking, so you can spend more time enjoying the fun part—eating!
– Kid-friendly: Kids will love helping out in the kitchen, making this a perfect family activity.
– Customizable: You can easily adapt the ingredients to suit your taste, ensuring everyone gets their perfect slice.
– Beautiful presentation: The layers create an eye-catching dessert that’s perfect for impressing guests.
– Deliciously satisfying: With its creamy texture and rich chocolate flavor, it’s a dessert that truly hits the spot.
Ingredients You’ll Need
Gathering your ingredients is half the fun! Here’s what you’ll need to create your own Wild Forest Classic Dirt Pudding Cake.
For the Cake Layers
– chocolate sandwich cookies
– unsweetened cocoa powder
– cream cheese
– powdered sugar
– vanilla extract
For the Pudding Layer
– instant chocolate pudding mix
– milk
For Topping
– whipped coconut cream
– dark chocolate shavings (optional)
Variations
One of the best things about desserts like Wild Forest Classic Dirt Pudding Cake is their versatility! Feel free to get creative and make this cake your own with these fun variations:
– Swap the cookies: Use vanilla sandwich cookies instead of chocolate for a lighter flavor twist.
– Add fruit: Layer in some fresh berries or banana slices for a fruity kick that complements the chocolate perfectly.
– Change up the pudding: Try using vanilla pudding for a different flavor profile that still tastes heavenly.
– Top with nuts: Chop up some nuts and sprinkle them on top for added crunch and texture.
How to Make Wild Forest Classic Dirt Pudding Cake
Step 1: Prepare the Cookie Base
Start by crushing the chocolate sandwich cookies into fine crumbs. This will create a deliciously crunchy base that mimics dirt in our cake. You can use a food processor or place them in a zip-top bag and crush them with a rolling pin. Set aside about one cup of crumbs for topping later.
Step 2: Mix the Cream Cheese Filling
In a large mixing bowl, beat together cream cheese, powdered sugar, and vanilla extract until smooth and creamy. This mixture adds richness and binds all our layers together beautifully. Make sure there are no lumps for that perfect velvety texture!
Step 3: Prepare the Pudding Layer
In another bowl, whisk together instant chocolate pudding mix and milk according to package instructions. It’s important to get this step right as it forms one of our key layers. Let it sit for about 5 minutes until thickened.
Step 4: Assemble Your Cake
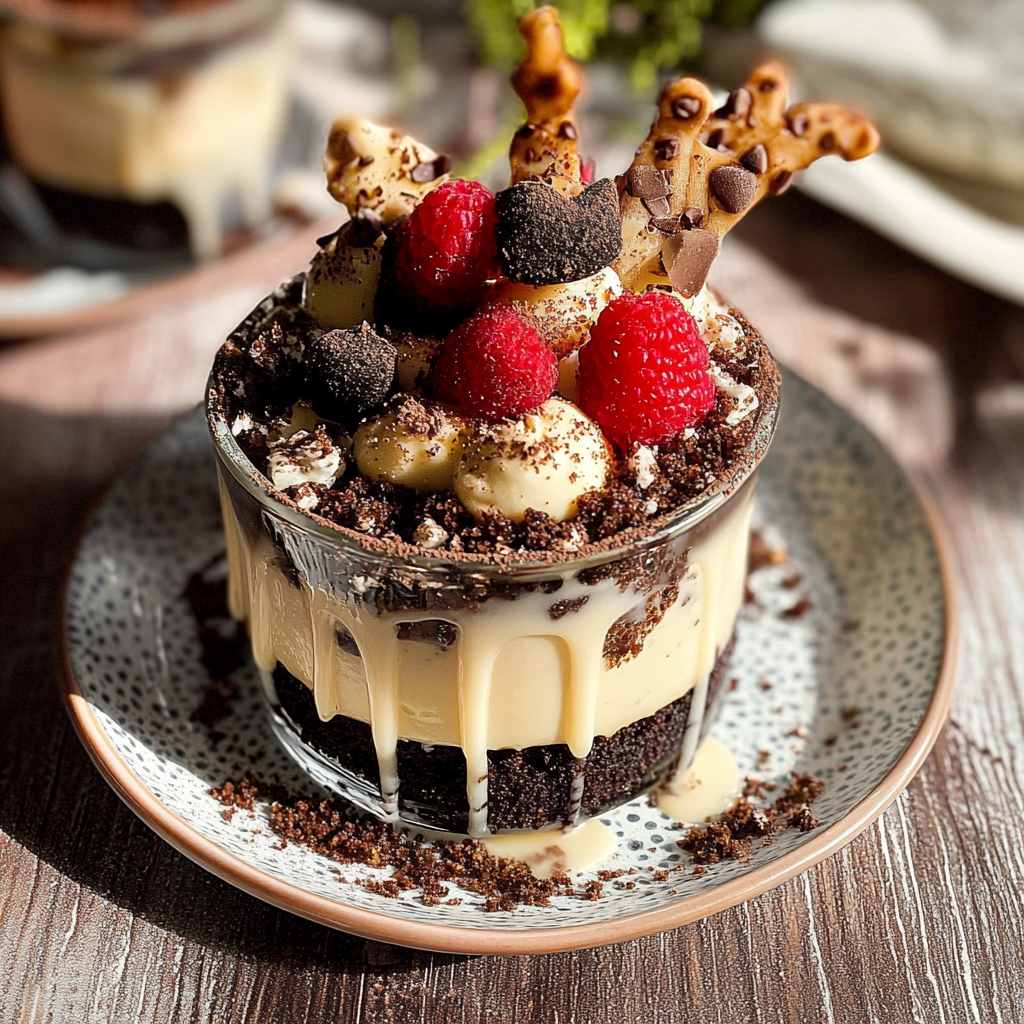
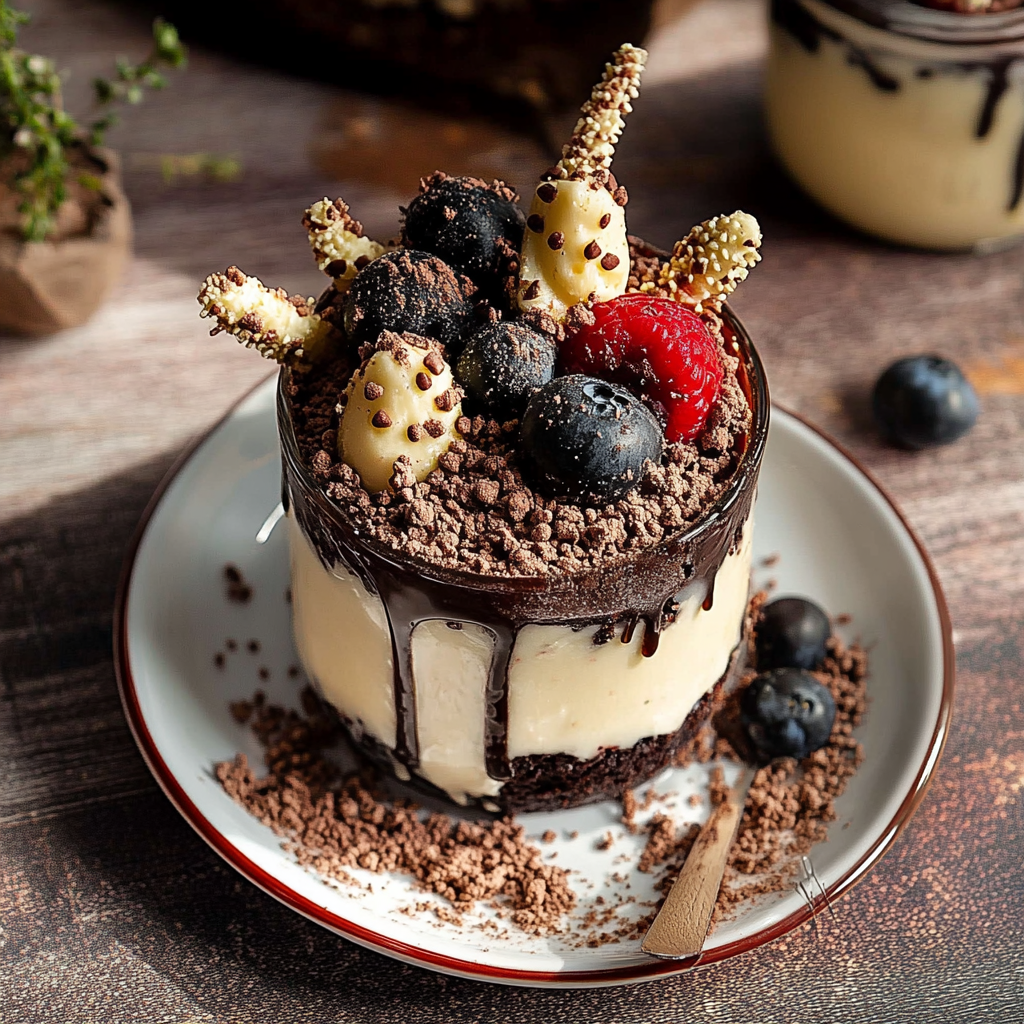
In a trifle dish or large glass bowl, start layering! Begin with half of the cookie crumbs at the bottom, followed by half of the cream cheese filling, then half of the pudding layer. Repeat these layers until all components are used up. The visual appeal of these layers is part of what makes this dessert so special!
Step 5: Finish with Topping
Top your Wild Forest Classic Dirt Pudding Cake with whipped coconut cream and sprinkle reserved cookie crumbs on top as well as dark chocolate shavings if desired. The final result should be as delightful visually as it is delicious!
Step 6: Chill Before Serving
Refrigerate your cake for at least two hours before serving. This chilling time allows all flavors to meld beautifully together—a crucial step you won’t want to skip!
And there you have it—your very own Wild Forest Classic Dirt Pudding Cake ready to wow friends and family! Enjoy every delightful bite!
Pro Tips for Making Wild Forest Classic Dirt Pudding Cake
Creating the perfect Wild Forest Classic Dirt Pudding Cake can be a delightful experience! Here are some tips to ensure your dessert is as delicious as it is fun to make.
– Use fresh ingredients: Fresh cream and quality cocoa powder will elevate the flavor of your pudding cake. Always opt for the best you can find.
– Chill before serving: Allowing the cake to chill in the refrigerator for several hours enhances the flavors and gives it a firmer texture, making it easier to slice.
– Experiment with layers: Feel free to add different layers of crushed cookies or even fruit between the pudding layers for added texture and flavor.
– Don’t skip the decorations: A sprinkle of crushed cookies or edible flowers on top adds visual appeal and makes your cake look even more inviting.
– Serve with a smile: Remember, presentation matters! Serve with enthusiasm to make your dessert even more enjoyable for everyone.
How to Serve Wild Forest Classic Dirt Pudding Cake
Serving Wild Forest Classic Dirt Pudding Cake can turn an everyday dessert into a festive treat. Here are some creative ideas on how to present this delightful dish.
Garnishes
– Fresh berries: A handful of raspberries or strawberries can add a pop of color and freshness that complements the rich chocolate.
– Whipped coconut cream: This dairy-free option provides a light, airy contrast that pairs perfectly with the dense pudding layers.
– Mint leaves: A few sprigs of fresh mint not only add a splash of color but also enhance the overall flavor profile.
Side Dishes
– Fruit salad: A refreshing mix of seasonal fruits balances out the rich sweetness of the dirt pudding cake.
– Vanilla ice cream: A scoop of creamy vanilla ice cream is always a crowd favorite alongside chocolate desserts.
– Coffee or tea: Serving a warm beverage helps to cut through the richness and enhances the overall experience.
Make Ahead and Storage
Preparing ahead of time can make hosting or enjoying this dessert much easier. Here’s how to store your cake effectively.
Storing Leftovers
– Cover tightly: Use plastic wrap or an airtight container to keep any leftovers fresh and prevent them from absorbing odors from your fridge.
– Refrigerate promptly: Store any remaining cake in the refrigerator within two hours of serving to maintain quality.
Freezing
– Wrap securely: If you want to freeze portions, wrap slices in plastic wrap followed by aluminum foil for extra protection against freezer burn.
– Label and date: Don’t forget to label your wrapped cake so you can easily identify it later; it’s best enjoyed within three months.
Reheating
– Thaw overnight: When you’re ready to enjoy frozen slices, thaw them in the refrigerator overnight before serving for optimal texture and taste.
– Enjoy chilled or at room temperature: This dessert is delightful straight from the fridge or allowed to sit at room temperature for about 30 minutes before serving.
FAQs
If you have questions about making or enjoying Wild Forest Classic Dirt Pudding Cake, you’re not alone! Here are some common inquiries answered for you.
Can I use non-dairy milk in this recipe?
Absolutely! Non-dairy options like almond milk, oat milk, or coconut milk work wonderfully as substitutes for regular milk in this recipe.
How long will this dessert last in the fridge?
When stored properly, Wild Forest Classic Dirt Pudding Cake can last up to 5 days in the refrigerator. Just remember to keep it covered!
Can I add other flavors besides chocolate?
Certainly! You can incorporate various flavors like vanilla, caramel, or even coffee by adjusting the pudding mix or adding extracts.
Final Thoughts
Wild Forest Classic Dirt Pudding Cake is not just a dessert; it’s an experience filled with joy and creativity. I encourage you to gather your ingredients, invite some friends over, and try making this delightful treat today. Your taste buds will thank you!